Thursday, May 1, 2014

We bought a house!

So yeah, we bought a house... in Allen, TX!


I'll try and post some pics over the next few months of projects that we have planned.  We love the house but we have quite a list of things that need to be done!  The front needs all those old shrubs torn out, a facelift on the fence and the grass and flowerbeds need some TLC. 


We love love love that it has a pool!  And a huge backyard!


But again, we've got big plans for the space.  Meanwhile we'll be enjoying our new space (LOTSA LOTSA SPACE!) and neighborhood!

Exciting times! :)

Wednesday, January 22, 2014

When faced with disappointment, clean your closet.

Sooo, I had written this long winded whiney post about how my New Year's Resolutions were already in the toilet but I decided to delete and start over.  In a nutshell, we got some bad news about our move to the East Coast and it appears we will be staying in the North Texas area for longer than either of us wanted.  SUCK.  The first few days I wanted to wallow in self pity and cuss out everyone but I think I'm starting to feel a little better... Not a lot, but a little.  Matt and I went house hunting last weekend and it was nearly enough to throw me back into despair but I'm trying, ok?  I just can't get excited about paying 300K for a stupid house that barely has a yard or extra room.  I've spent the last 3 months looking at houses in South Carolina that had huge yards and wooded lots and finished basements...  Like you could go into your backyard and be surrounded by trees and greenery and barely see your neighbors house a few hundred yards away.  Instead, we'll look for a house here where our neighbors houses are about 10 FEET from ours.  Of course you can't really see anyone's house anyway because for some reason people see it fit to park their cars all along the streets here.  Drives me insane.  But, I digress and I realize these are even less than first world problems and I need to put on my big girl panties and move on.  It's only a small set-back and not a big deal in the grand scheme of things.  I've sort of fallen off the wagon on the rest of my resolutions because I needed to be sad and miserable for several days.  In order to make myself do something productive (and that would be a positive experience for me) I decided to clean my closet. 

Reasons to clean your closet:
1. You can't find anything and therefore wear the same leggings and Mumford and Sons concert tee over and over again...without a bra cause who the hell knows where the only one that fits is?  Probably under that lone snow boot that is missing it's mate.  
2. Your clothes get so messy they fall off the hangers and onto the floor where you store your dirty clothes so you end up washing random clothes that you never even wore - true story.  And I hates doin' the laundry so doing extra is just dumb.
3. You buy a cute top only to realize you already have one almost EXACTLY like it hidden in the recesses of your closet. 
4. You start digging thru there for something and find a Christmas present that you had hidden.
5. Being disorganized is the devil's playshop... wait, that's not how that goes... organization is close to godliness?  I don't know, but there is something about being organized that does make you feel better. 

So here's where we started:


I want to point out a few things.
1. I had to pick a few things up off the floor in order to take this pic - some stuff you just don't want to share with the WWW, trust me.  The first pic is looking to the left side of the closet, the second is looking to the right side.
2. I went thru a major overhaul and got rid of half my clothes and shoes when Matt and I got married 3 years ago because I had to go from 2 small walk-in closets to one.  Yes, all my stuff has to fit in the tiny closet.  (again with the whining...I'll stop)
3. I have attempted to organize it in the past because it's pretty small.  Hence the door shoe organizer, the shelf shoe organizer and all the baskets on the shelves.
4. I don't have a good pic of the top shelf but there was all kind of junk up there.  Honestly I think I threw most of it away.

When cleaning your closet the first thing you have to do is pull all the sh*t out and start from scratch.  Our whole bathroom floor and most of the bedroom floor was covered.  I took all the baskets out and went thru those and organized them.  That top basket is my "work out clothes" basket.  I put everything in there so it would be easy to find and grab and I'd have no excuses to not work out.  Well that will work if you are willing to keep it neat and tidy.


I emptied them, separated and folded the contents and then only put the necessities back in. 
For example, I took my yoga stuff out of my workout basket and only put in a couple of running shorts, sports bras and running pants.  Now it's much easier to find what I'm looking for.

Next I made sure I had all my summer stuff (I keep the off season stuff stored somewhere else due to the size of my closet) was weeded out and put in our extra suitcase that I store on the top shelf.  I've found that this process works.  You could probably use a big plastic bin but I use the suitcase because it's stored up there 99% of the time anyway.  I then separated the clothes by type - pants, long sleeve button shirts, pullover shirts, etc.  I also pulled all of my cocktail dresses out and went thru those...


I had over 15 cocktail dresses in my closet and most of them I haven't worn for over 3 years.   I put most of them aside to donate and kept 3 or 4 of my favorites.  I should also mention that over half of them were a size small or a size 4 and this sister ain't a size 4 no mo. truth.  After I decided on which ones to keep, I took those and the jackets I had hung in my closet and hung all of those in the hall coat closet.  They only take up about a quarter of the space and that's a much better spot with more room.  Once everything was separated I hung it all back up.

Progress:


I then put my shoe shelf organizer on the opposite wall and stocked it with the shoes I wear the least (fancy heels for the most part...).  I do wear my boots often this time of year so they fit nicely on the top shelf and I actually used a rubber band to hang some of the taller ones up (pic below).  The over the door shoe organizer keeps my flats, running shoes and Toms convenient - which is good because I wear those most!  I kept one of my built in shelves open to fold sweaters.  I can't stand when I hang sweaters and they get those weird pulls and bumps on the shoulders, you know what I mean?  I also moved my giant laundry basket to the laundry room and replaced it with a smaller one that doesn't take up as much space.  The very top of the closet has the suitcase filled with summer clothes, a plastic bin with random summer essentials (suits and cover-ups, flip flops, etc).  I'll switch those to a basket on the shelves in the summer and put away sweaters, leggings and boots.  That top shelf is also a place for my extra purses, a Rubbermaid file organizer and a few other boxes of trinkets.


Much better! I think the key to having a tiny closet is rotating things seasonally.  When I had two closets I could keep everything out.  Now that I've got limited space, it's a good practice to donate/sale things you don't wear. Store things that are out of season.  And utilize other storage areas of your house.  It's ok to keep you LBDs in the coat closet, no one cares.  Who knows, maybe our next house will have one of those giant exorbitant closets with a chaise and mirrors and fancy glass cases to display my Prada bags and Louboutin shoes.  If so, I will totally need to go shopping for a Prada bag and Louboutin shoes.

PS - I actually did this about a week ago and the good news is that my closet is still THIS organized! Win!

Wednesday, January 8, 2014

A Resolution that is about ME

Here they are... I'll explain after.


I haven't really participated in the New Years Resolutions practice for the past couple of years.  I used to write about them on my old blog.  I would commit to working on things that I needed to improve... patience, being more open minded, reading my bible every day, etc.  Sometimes I'd aim to be better organized or more strict with our finances.  The last couple of years I just haven't had the energy to commit to any of it.  Not losing weight, not saving money, none of it.  And to be honest I still don't have the energy to come up with some new way I'm going to "make a bunch of changes"... I have, however, decided that this year I will take more time for just me.  Not big stuff, little stuff...  Let's face it, we have to focus on ourselves sometimes so that we can better focus on others.  Little things like - I'm going to take time to paint my nails more often... time to give myself a pedicure because the days of getting a professional one every 2 weeks are long gone (childcare costs A LOT!).  I invested in a good skin care line and I want to take the time each day to use it.  Those are small things but they can add up.  I don't have a goal to lose weight, but I do want to take time to be more active.  I will go thru spurts where I run every day.  In the past I have trained for marathons and triathlons and 100+ mile bike races... but lately I'll go for weeks doing ZERO exercise...  I get up and walk 10 yards to sit at my desk where I will then sit ALL DAY LONG...  In the evening we generally eat and then sit on the couch for several more hours watching TV.  Netflix binge watching with the hubby is the way more attractive option than getting out in the cold, what can I say.  It's really ridiculous and I need to change or I may end up old, out of shape and arthritic. 

One of the bigger goals this year is getting my novel published (or at least gaining representation from a literary agent).  I haven't shared much about my novel but I seriously need to stop dragging my feet.  I actually wrote it last year... in three months.  I then had several meetings with literary agents with a more than positive outcome.  Out of the 3 meetings I had, 2 agents asked for my manuscript.  However, while at a writing conference I was given the same advice by more than one industry expert... change the main premise of my book.   I have three main characters in my book and the advice was to take out one of them... only thing is that the one they suggested eliminating is the reason I wrote the book.  My novel is considered paranormal fiction, if I took out the character in question there would be nothing paranormal about it anymore.  But I decided to follow their advice...so after the conference I decided to do a ton of rewriting.  My plan was to rewrite a big chunk of it and then submit it to the agents who had been interested.  Well, that worked for a week or so and then I hit a standstill.  I couldn't write it without the main character that I had grown so close to.  At that point I decided to put it aside and pick it back up several weeks (which turned into months) later.  When I started writing again I felt refreshed, I went back to my original draft because that is the novel I wanted to write - not the changed version I had attempted after the conference.  I rewrote and added several chapters to the book and started in on some final edits.  I was literally preparing emails to prospective agents when my external hard drive crashed.  Everything was on that hard drive... Digital photos from the last decade...my novel...copies of important documents...  I found out the "passport" is known for doing this - crashing and you lose all your schtuff.  I was devastated.  I took it as a sign and pretty much gave up on my novel.  I did have an old copy from 6 months prior but I had made so many changes and added a ton of work since then (yes, I am thankful that I had thought enough to back it that long ago).  Fast forward to now... when I decided to focus on myself a little more this year, I decided I wanted to add writing back into my life on a regular basis.  I bought myself a new laptop - my first time to ever have a brand new computer for just me!  Matt bought me an extra flash drive and now I'm set to "restart" on my book... and restart my photo collection... Everything I lost can't be replaced but I have to start somewhere. 

This year will hopefully be full of changes without making resolutions though.  Matt and I are tentatively planning an out of state move.  *fingers crossed that all works out*  We've been looking at homes and even discussing with family and friends.  We'll know more about that in a couple months but the thought of having OUR own house (one that we both buy and move in together) is an exciting one.  Hopefully I will have more to blog about that whole endeavor later.

I know that's not much of a resolutions list, but they are important things that I'd like to do this year... I don't want to set up goals that I will only keep for a few weeks or months.   A new year (even tho it's just a page change on the calendar) does symbolize new beginnings.  I hope you set new goals for yourself as well... and most of all, I hope you reach crush them!

Thursday, December 5, 2013

Wrap-Around Ottoman Tray - one of my favorite projects!


So we have one of those giant ottomans instead of a coffee table.  I like it because you can push it into our sectional and it creates a gigantic couch which is perfect for forts, sleepovers and just general movie watching.  The only thing is if you want to snack or have a place to set you're drink your outta luck.  So like most people with this type of sofa, we had those little trays sitting on top of it which is fine I guess...


I just got tired of them and wanted something a little more special, ya know?  I'm all about custom stuff to make our house more homey.  I looked online and really couldn't find anything like I wanted.  I had the exact design in my head (sort of a long shelf with smaller boards that would hang off each end to "hug" the ottoman). I also wanted it to function as a very short table if needed (you'll see that below).  After some searching, I did find a wrap-around ottoman tray from a place on Etsy that was nearly $400.

VIA

 It was exactly what I had in my mind (which means it was SUPER simple) so I was shocked at the price.  Granted it is very pretty, made from reclaimed wood and all that.  We made ours for about 15 bucks... And we even bought the upgraded wood and I toyed with staining it but I really wanted a more whimsical piece for our room.  I thought about doing a chevron pattern cause that's super popular right now but I figured I'd get sick of it.  Then it came to me, I'll do Subway art and since we spend most of the time on that couch watching our favorite TV Shows and movies, we'll features some of our favorites on it.  I wanted it to be one of a kind and I think we accomplished that.  So here's how we did it:

First we measured our ottoman and then added an inch to that measurement and purchased a board that could accommodate that measurement from the hardware store. And like I said, we even bought the nice wood (I think it was $12 as compared to the cheaper stuff that you can get for around $8).  The nicer boards are pretty enough to be stained if you wanted.

Next, Matt cut it down to size.


You can see from above that there was over a foot left in excess board.

Next he sanded...


At this point you could use your leftover board to make the "legs" of the tray.  Just cut it to the size you want (in other words cut the legs to the length you want them to hang over your ottoman).  We had a scrap piece of 1x4 in our garage so we ended up just cutting it to size and using it.  Matt attached the "legs" with L brackets - less than $2.


I added some wood putty to the seams and then sanded a bit more.


I knew at this point I was going to paint it a light color so I thought the filler would give it more of a finished look.  If I was going to stain it I would have left the wood the way it was.  I gave it a couple coats of Glidden Mid Day Mocha - it's sort of a greige.  I just bought a sample tintable tester, they are inexpensive and I didn't even use half!  After the paint dried it was time to start on my Subway Art.


Now there are a TON of tutorials out there on how to do Subway Art.  A lot of them require vinyl printers - which I don't have.  The other popular way it to print letters on normal paper then trace them on contact paper then cut them out then put them on your piece then paint over them, etc etc etc.  It seems to work well for people but I don't have the patience for all that!  I used stencils and white paint.  When I first started I thought it was going to be hard but once I got the hang of it, it was easy... and actually fun.  Matt and Cady ended up doing some as well.  The important thing to remember if you are using this method is to do it in stages.  I would have several words in progress on different parts of the board - one letter at a time.  You will have lots of breaks for dry time. We had some stencils from previous projects and for future projects, but you can get them at Hobby Lobby.  I let the paint cure over night and then distressed it a bit the next day.


I used 150 grit sand paper so it was really just a light sanding.  You may not be able to tell the difference in the pic but it's there.  The sanding took away any of the glops of paint or uneveness in the thickness.  Did that even make sense? It also gave it a weathered look, which is what I was going for.  The last thing I did was give it 3 good coats of polyurethane.  I did this because I knew it was going to have glasses set on it and plates of food, etc.  It needed to be wipeable. :)

Here's a closer shot of the words we wrote... out favorite shows, channels, sports teams, etc.  And at the bottom we put our names.


And it can also easily be removed and used for this:


A nice tray for the kids if they are sitting on the floor.  LOL at Milo's face... when he goes in for a snack, he totally commits!

We love it!


Friday, November 22, 2013

Our Favorite Christmas Movies!

Oh my goodness, I love Christmas!  And Matt (obviously - he IS a movie critic afterall) loves movies!  Combine both of those and it's a win-win!  I won't lie, it's not even Thanksgiving and I've got my schedule for ABC Family's 25 Days of Christmas Movies ready... I've also got my  Hallmark movies ready to be DVR'ed.  I will admit, some of the Hallmark ones can be a little cheesy, but I love them anyway.  I've even got Cady hooked on watching them.  That being said, there are a few Christmas movies that we MUST SEE each season and this year is no different...  Only difference is I've made a list!  Cause everyone knows I love a good list.  This week I even went to Target and purchased a brand new spiral just for my list making purposes.  It's got flags and tags and dividers.  I've used color coded ink, highlighters and sharpies.  I love it, but I digress.  Back to the Christmas movies!


I've put our faves into three sections.  Mine, Matt's and Ours.

Mine:


I'm a fan of the "Holiday Romantic Comedy" as you can see from Love Actually, The Holiday and The Family Stone.  I also like some of the family classics - Home Alone and Polar Express.  Each of these movies has moments that give me a lump in the throat and bring tears to my eyes.  And each of them has a happy special Christmas morning at the end - that's not a spoiler, if you didn't know that you've been under a rock!

Matt's:


I asked Matt why he likes these particular three and he said "Scrooge because it is a classic..Christmas Story because of the nostalgia of the era.. and Surviving Christmas for the dysfunction".

And then there were a few that were on both of our lists...

Ours:


Elf has been a family favorite for years.  We have just about worn out our DVD.  We love to watch it and decorate the tree - it's a tradition.  Christmas with the Kranks is a relatively new movie on our favorites list.  It's funny and slapstick and you can't help but laugh at this poor family's silly mishaps!  Matt and I are not fans of A Christmas Vacation, but love this - they are similar in a way.  And of course, I can't wait to watch the classic Grinch Stole Christmas and Charlie Brown Christmas on TV each year.  Matt was born in the 60s and me in the 70s - and we both grew up watching these.  Gage and Cady are also fans and I hope Milo will be as well.  (I'm totally humming the Whoville Christmas song right now...)


So those are our favorites!  Don't you just love movie watching this time of year?  We have freezing weather and rain (perhaps sleet) in the forecast this weekend.  That means a fire will be built, hot chocolate will be made and Christmas movies will be watched.  Yessss!

Tuesday, November 12, 2013

Mini "Eating Area" Makeover

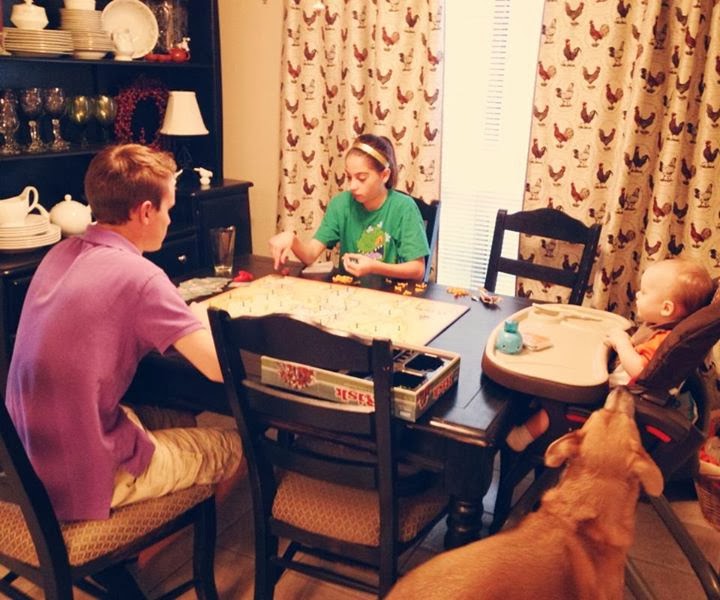
Our growing family has prompted us to make quite a few changes around our home in the last few years.  We put french doors on what was once our formal dining room and made it into an office/guest room.  We HAD to have a guest room because when Gage went away to college, his room became Milo's nursery.  When Gage comes home he can't very well sleep in the crib with Milo or on the couch for weeks on end so a temporary guest room was in order.  That worked out well for a while...sorta.  The issue came when we moved our dining table and hutch into the breakfast area of our kitchen.


We had to put the hutch in front of one of the windows - there wasn't an open wall.  I wasn't crazy about this set-up because a) we lost a window and it's light and b) it was really crowded.  When all of us sat around the table it took some finagling, actually it was near impossible.  I finally decided a few weeks ago (especially with holiday family dinners planned...) to move the hutch out to the garage.  We'll be moving in the next year, so essentially we'll just store it out there.  Hopefully it will have a place in our next home.  I added our table leaf that had been in the attic and a bench to one side of the table so that we could seat at least 5 now.  I also decided to take down our thick dark curtains to allow more light in...  Unfortunately, when I took down the curtains it revealed our horrible mini-blinds.  All of the bottoms were missing slats and had rips from a dog that we had staying at our house at one time. They were also covered in a thick dust that no matter how much I scrubbed wouldn't come off.  I think when the kitchen walls were re-textured many years ago, the contractors just left the blinds up.  


As you can see, this is MUCH better.  Look at all that natural light and space around the table!  The old blinds went in the trash and the old curtains were replaced with neutral panels.  The eat-in area stayed this way for a few weeks and then two NEW things started to bother me.  1...I missed my dishes from the hutch.  They are my grandmothers wedding dishes and there was just something comforting about having them near the dining table.  2...While I loved all the light and open windows, there was no privacy!  Our laundry room is located just off the area and there are quite a few times in a week that I need to make a naked dash there to grab something I'm looking for to wear.  I'm sure the neighbors were unimpressed...

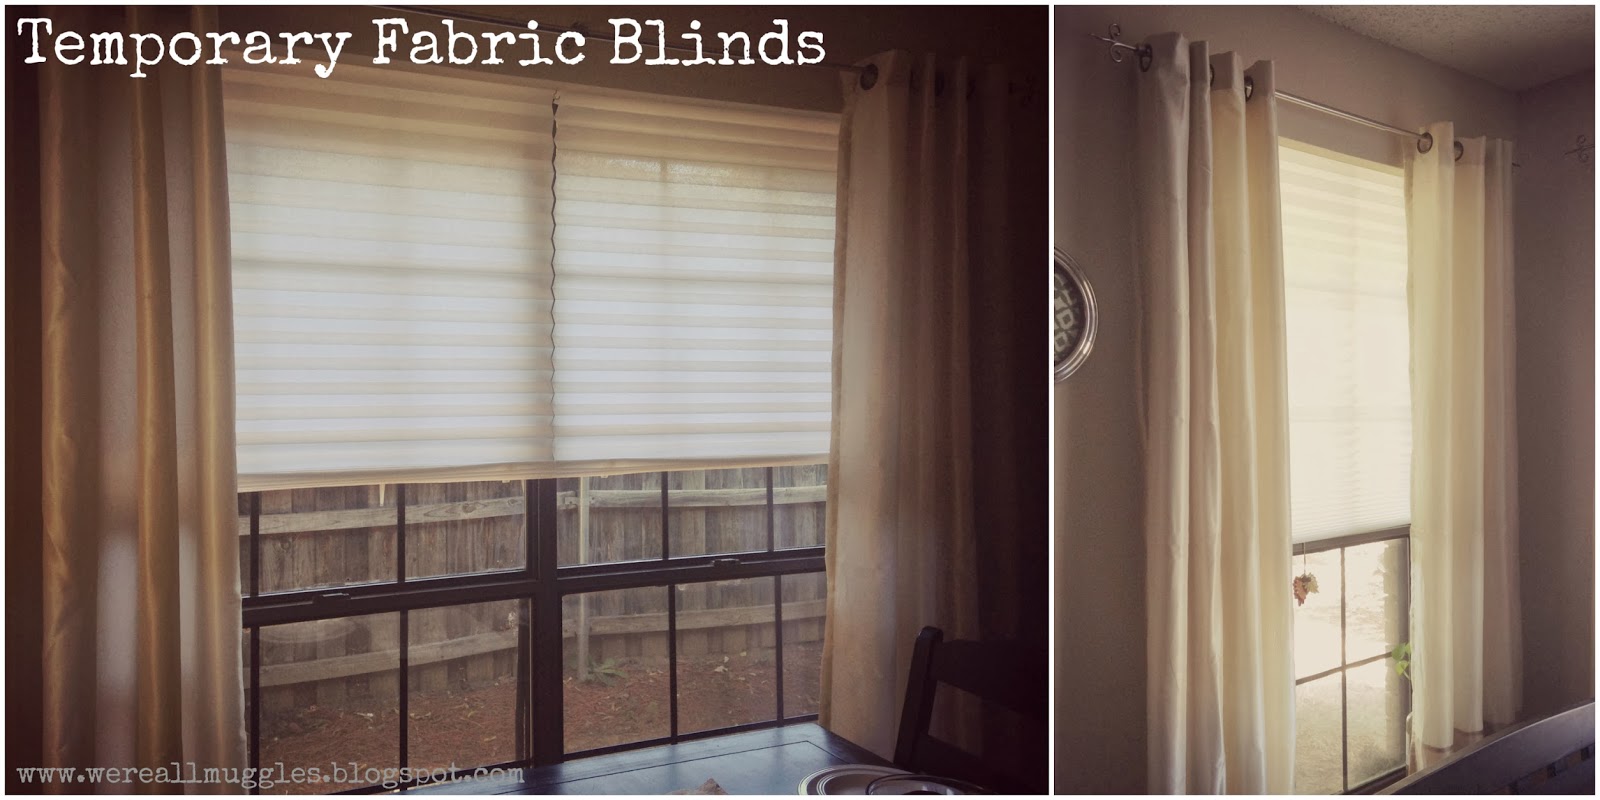
I searched online for cheap blinds or roman shades, but there wasn't really anything in our price range that worked.  Our big window is also not a standard size, so blinds would need to be custom ordered.  I know from blinds that we've ordered in the past that this isn't cheap. I also searched pinterest for an easy DIY shade of some sort but didn't really find anything I liked there either.  Queue my amazon search.  That's when I found these fabric temporary shades.  They were $8 a piece and could be cut down (with scissors or utility knife!) to fit our windows.  You can get them as low as $3 depending on the size you need.


The reviews were really good so I decided to give it a try.  So far, so good.  They were super easy to cut and then install.  I think it took less than 5 minutes.


The next thing I tackled was some sort of shelving so I could display a few things.  I knew it needed to be very non-invasive as space is precious in this area.  Initially I thought I'd get Matt to DIY me some skinny shelves.  You could totally buy a few 1x4s and then some "L" brackets and hang them on your own... Only thing was, he'd have to find time to build them... and he'd have to also build in some type of lip so that I could put plates on them if I wanted.  Then I'd need to prime and paint them and then he'd need to install them. The benefit to all that is we most likely could have done it for $20.  I decided to check amazon for grins and came across these.  I wanted them to be varying sizes and these would be perfect for plates because of the lip.  They also looked really nice and finished.  I'm amazon prime so shipping would be free and they'd get here in 2 days, so I went with it - it was worth the extra $15.  Matt installed them the day they came in and I think they turned out adorable!


And I know I'll be able to add little holiday touches here and there.


 The shelves take up zero room so we didn't lose any space.  The fabric blinds were inexpensive, easy to install and still let in all of our natural light.  Yay!  Problems solved. Best part of this mini-makeover is all the extra space we'll have around the table now - makes me ready for a turkey dinner!

*sponsored post

Tuesday, October 29, 2013

Acorn Wreath! DIY


We have tons of acorns and pine cones in our front yard.  I LOVE Fall so I was jonesing to find a cute craft to use them.  I did use some of them on our Autumn themed mantel this year, but I needed a way to use the rest!  Last year Cady and I did a Fall themed ribbon wreath, but I was sort of tired of it so I decided "hey!  I could make an acorn wreath!"  There are tons of them on sale online and even other tutorials, but I figured it would be super easy and I was right.  It also cost me less than 10 bucks so that is the real win!

Gather:
First things first... You gotta find a super cute 1 year old to help gather acorns!


Fortunately I have one of these (if you don't, gather them yourself or grab any size kid, hubby, aunt, uncle, etc)!  Cady isn't as interested in doing crafts me with anymore (she's 13 and can't seem to get her face out of her phone...), but Milo loves hanging out and picking up dirty acorns, sticks, pine cones and anything else his chubby little hands can find.  I think one of my favorite parts of the holidays is doing crafting with the kids.  I've got a few pinned that will interest Cady and even a few that Milo can participate in.

Cleaning & Baking (don't skip this - you don't want outside critters infesting your house!):
Bring your Fall goodies inside and rinse them in the sink.  I use our plastic colander so that I can really shake, bounce and sift all of the dirt off - you may have to do this a couple of times depending on how big your colander is and how many acorns you collect!  I run the colander through the dishwasher afterwards to make sure it gets sanitized.  Put your acorns on a few papertowels to get the excess water off and then line a cookie sheet (or 2) with aluminum foil.  Dump your acorns (and pine cones if you have them) on the sheets and make sure they are single layer.


Once they are finished baking, let them cool.  You can leave them in longer, but I've found that 20 - 30 minutes at 200 degrees works perfect.  One time (yes, I've baked quite a few batches of acorns!) I cranked the heat up because I was going to multitask and preheat my oven for something else and the acorns started popping!  Like they seriously EXPLODED!  Another tip, before I put them in the oven I sprinkle them with cinnamon.  It makes them smell nice.

Assemble:
You'll need a Styrofoam wreath - whatever size you want, I used a 12 inch because that's what I had.  I wouldn't go much bigger because you'll need a TON of acorns and it could get too heavy.  I saw some really cute mini ones for sale online that looked like they were about 5 inches.  You'll also need ribbon, straight pins and a glue gun.


The ribbon was (obviously) 50% off at Hobby Lobby.  You KNOW you should never buy anything that is not on sale at Hobby Lobby...  And you probably won't use the whole roll.

Wrap the ribbon around the wreath, securing it with straight pins (see pic below).

Next I sorted thru the acorns.  I used plain ones for the first layer to cover the wreath.  I mainly covered the front of the wreath and the bottom inside.  There is no need to cover every square inch but if you want to, go for it!  I saved some of the "prettier" acorns to glue on as a partial second layer.  I also glued the tops of the prettier ones onto the acorn so it wouldn't fall off later.


Like I said, the second layer is just a partial one.  I mostly used it to pretty up the wreath with the capped acorns and fill in any gaps.

Lastly I bought a roll of thick burlap ribbon to use for a hanger (again 50% off at Hobby Lobby and you won't use nearly all of it).  I folded it lengthwise and then made a bow at the top (folding it lengthwise make it extra sturdy and also gives the bow extra volume once you fluff it out).  You can use the leftover burlap on other fall or even Christmas decor!


Voila!  I love it!